Why Your Hips Are So Tight (It's Not Just Sitting)
If you've ever tried to touch your toes after a long day at a desk and felt a sharp pull in your hip flexors, you know the frustration. But the real culprit isn't just the chair. Most people don't realize that chronic hip tightness is often a protective response from your nervous system. When you sit for hours, your hip flexors shorten and your brain perceives that position as normal. Then, when you try to stretch, your muscles contract reflexively, fighting back. This is why static stretching alone rarely works for desk workers.
I've been there. When I first started stretching my hips, I would hold my breath and push into pain, thinking more effort meant faster results. I learned the hard way that forcing a stretch only makes your nervous system tighten up further. The key is to coax the muscles into releasing, not bulldoze them. That's where this routine differs: it's designed to calm the nervous system first, then gently mobilize the hips.
To understand the root cause, think about your daily habits. Prolonged sitting, stress, and weak glutes all contribute. Your hip flexors (the muscles at the front of your hip) become chronically shortened, while your glutes and hamstrings weaken. This imbalance creates a tug-of-war, and your nervous system responds by locking everything down. If you want to untighten those muscles, you need to address both the mechanical and neurological sides.
Before You Stretch: Soft Tissue Prep (2 Minutes)
Jumping straight into deep stretches without preparation is like trying to untie a knot with frozen fingers. You need to warm up the tissues and signal safety to your nervous system. I recommend starting with a simple self-massage technique using a tennis ball or lacrosse ball. This is especially useful for targeting the gluteal muscles and piriformis, which often refer tension into the hip.
Place the ball under your right glute near the hip joint, lean against a wall, and gently roll in small circles for 30 seconds. You'll find tender spots - hold pressure on each for about 10 seconds until you feel a release. Repeat on the left side. This soft tissue prep helps desensitize hypertonic muscles and increases blood flow. It's a game-changer, especially if you have extremely tight hips that don't respond to standard stretches.
After the ball work, take 5 deep breaths in a seated position, focusing on exhaling fully. This activates the parasympathetic nervous system, which is the "rest and digest" mode. Without this step, you're stretching into a stressed system, and the results will be minimal.
The 10-Minute Routine: Stretches That Target the Nervous System
This routine is structured as a sequence, not a random set of stretches. Each move builds on the previous one, progressively releasing tension from the core outward. Perform each stretch for 45 seconds to 1 minute, focusing on slow, rhythmic breathing. If you feel a sharp pain, back off. The goal is a gentle pull, not a tear.
1. Diaphragmatic Breathing in Child's Pose (2 minutes)
Begin on your hands and knees, then sit back onto your heels, extending your arms forward. Rest your forehead on the floor or a block. Here's the trick: instead of just hanging out, breathe into your low back. As you inhale, imagine your ribs expanding sideways and your belly pressing against your thighs. As you exhale, soften deeper into the pose. This activates the vagus nerve, which tells your muscles to let go. Most people hold their breath in child's pose, which keeps the hips guarded. Don't do that.
If your knees are uncomfortable, place a folded blanket under them. If your hips are extremely tight, you can separate your knees wider or place a pillow under your chest. The goal is to find a position where you can breathe deeply without strain.
2. Supine Figure-Four Stretch (1.5 minutes per side)
Lie on your back, bend both knees, and place your feet flat on the floor. Cross your right ankle over your left thigh, just above the knee. Then, gently lift your left foot off the floor and thread your right hand through the gap between your legs. Clasp your hands behind your left thigh and pull it toward your chest. Keep your head and shoulders relaxed on the mat.
The common mistake here is to yank your leg aggressively or to let your lower back arch off the floor. Instead, think of drawing the thigh in gently while keeping your spine neutral. If you feel a pinching sensation in your hip, try moving the crossed leg lower (closer to the knee) or use a strap around your thigh. As you breathe, imagine the tension melting away with each exhale. This is a classic hip opener, but only effective if you don't force it.
3. Seated 90/90 Stretch (1.5 minutes per side)
Sit on the floor with your legs bent at 90 degrees: one leg in front of you, the other out to the side, both knees bent. Your front shin should be parallel to the front edge of your mat, and your back shin parallel to the back edge. This is a deep external rotation and internal rotation stretch. For beginners, you can sit on a folded blanket to elevate your hips. Keep your spine tall, not rounded.
If your hips are extremely tight, you may not be able to sit upright. That's okay - lean forward slightly, or place your hands on the floor for support. The key is to feel a stretch in the glute of the front leg and the outer hip of the back leg. Don't bounce. Hold still and breathe. This stretch directly targets the piriformis and deep rotators, which are often the culprits behind sciatica-like pain.
4. Half-Kneeling Hip Flexor Stretch (1.5 minutes per side)
Kneel on your right knee, with your left foot flat on the floor in front of you, left knee bent at 90 degrees. Place your hands on your left thigh for support. Gently tuck your pelvis under (like you're trying to flatten your lower back) and shift your weight forward slightly. You should feel a stretch in the front of your right hip. Avoid arching your lower back, which is the most common mistake. Instead, think of pressing your tailbone down.
For a deeper stretch, raise your right arm overhead and lean slightly to the left. But for beginners, keep it simple. This stretch is crucial for desk workers because it targets the rectus femoris and iliopsoas, the primary hip flexors that shorten during sitting. If you feel a sharp pinch in the front of the hip, you may be pushing too far forward. Back off and focus on the pelvis tuck.
5. Lying Hamstring Stretch with a Strap (1.5 minutes per side)
Lie on your back, loop a strap (or a belt) around the arch of your right foot, and lift your leg toward the ceiling. Keep your left leg flat on the floor or bent with foot planted. Gently pull the leg toward you until you feel a stretch down the back of your thigh. The key is to keep your hips square and your lower back pressed into the floor. If your leg wobbles, you're pulling too hard.
This stretch is often overlooked in hip routines, but tight hamstrings pull on the pelvis, which directly affects hip mobility. By releasing the hamstrings, you free up the posterior chain and allow the hips to move more freely. Breathe slowly and hold for 45 seconds, then switch sides.
How to Modify for Your Mobility Level
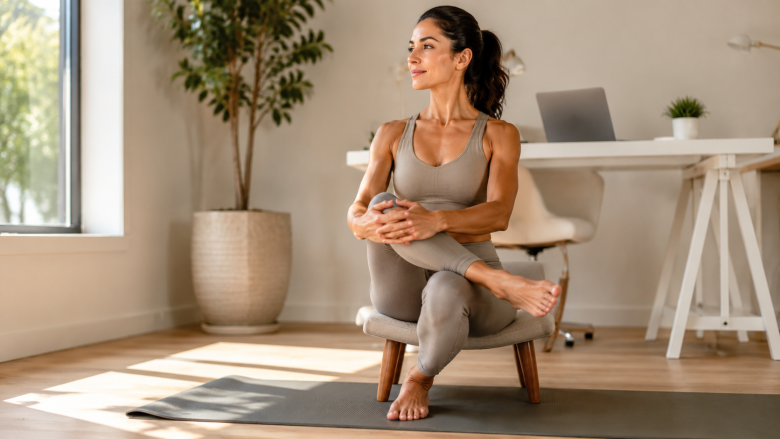
If you have extremely tight hips, every stretch can feel like a battle. The first thing to remember: never stretch to the point of shaking. Shaking means your nervous system is overreacting. Instead, dial back the intensity by using props: blocks, blankets, straps, or even a chair. For example, in the seated 90/90 stretch, sit on a high stack of pillows until you can maintain a neutral spine. Over time, you can lower the props.
Another modification is to reduce the range of motion. In the supine figure-four, instead of pulling your leg to your chest, just keep your foot on the floor and let the crossed leg rest. Even a small amount of stretch is effective if you breathe deeply. The goal is to teach your brain that stretching is safe, not to achieve a certain angle.
If you have a specific condition like hip impingement or labral tear, consult a physical therapist before trying this routine. These stretches are generally safe for most people, but sharp pain is a red flag. Listen to your body.
When to Stretch and What to Avoid
Timing matters. Stretching cold muscles first thing in the morning can be counterproductive because your tissues are less pliable. Instead, do this routine after a 5-minute warm-up like walking or gentle leg swings. Or better yet, integrate it into your evening wind-down, when your nervous system is naturally more receptive to release.
Certain activities can worsen tight hip flexors if done without proper form. Prolonged cycling, running with poor form, and excessive sit-ups all shorten the hip flexors. Even sitting on a couch with your legs tucked under you can aggravate tightness. If you must sit for long periods, take a micro-break every 30 minutes: stand up, march in place for 30 seconds, and do a quick standing hip flexor stretch. This prevents the muscles from adapting to a shortened position.
As we covered in our guide to How to Start a Gentle Morning Stretch Routine, consistency is more important than intensity. A 10-minute routine done daily will yield better results than a 30-minute session once a week.
The Missing Piece: Micro-Breaks for Desk Workers
Even the best stretching routine can't undo the damage of 8 hours of uninterrupted sitting. That's why I recommend setting a timer for every 30 minutes. When it goes off, stand up, shake out your legs, and take three deep breaths. Then, perform a simple standing hip flexor stretch: step one foot back, keep both feet facing forward, and bend your front knee while keeping your back leg straight. Hold for 15 seconds, then switch.
This micro-break habit retrains your nervous system to allow the hips to lengthen throughout the day. Over time, the baseline tension decreases, and your stretching routine becomes more effective. If you want to build a sustainable habit, consider pairing it with a daily practice. For a structured approach, see our Simple Weekly Stretch Plan for Flexibility.
Progressing Safely: When to Move to Deeper Stretches
After a few weeks of this routine, you'll notice that the stretches feel easier. You can breathe deeper, and the range of motion increases. That's a sign that your nervous system is starting to trust you. At this point, you can gradually increase the hold time to 90 seconds or add a gentle forward fold variation. But don't rush. The biggest mistake I see is people trying to force a deeper stretch too soon, which triggers the protective reflex all over again.
A safe progression is to add one new stretch every two weeks, such as the lizard pose or a reclined pigeon pose. Always pair a new stretch with the same breathing and soft tissue prep. If you feel a setback, return to the basics. This is not a linear process; some days your hips will feel tighter due to stress or sleep. That's normal. Honor where you are.
Key takeaway: Tight hips are not a mechanical failure - they are a protective response. By calming your nervous system with deep breathing, soft tissue prep, and gentle movement, you can unlock lasting release without force. This routine is a reset, not a punishment.
If you're new to gentle movement, consider starting with a home practice that builds body awareness. Our Beginner's Guide to Home Gentle Yoga offers a complementary sequence that pairs well with this hip routine. Remember, the goal is to feel better, not to achieve a photo-worthy pose. Your hips have been holding tension for years - give them time to learn a new way to relax.