Why most home workout plans fail (and how to fix it)
When I first tried to build a home workout routine, I made the classic mistake: I copied a gym program and tried to do it in my living room. Bodyweight squats were fine, but pull-ups? I had no bar. Deadlifts? No barbell. Within two weeks I was frustrated, skipping sessions, and eventually gave up. The problem wasn't my motivation - it was that the plan wasn't designed for my actual home constraints.
What I've learned since then, through trial and error and coaching dozens of friends, is that a sustainable home workout routine isn't about finding the perfect list of exercises. It's about building a system that adapts to your available space, equipment, noise tolerance, and schedule. This guide will show you exactly how to do that - step by step, with built-in progression levels, recovery scheduling, and habit strategies that actually stick.
By the end, you'll have a custom routine that grows with you, not a generic template you'll abandon in three weeks.
Step 1: Audit your home constraints (the critical step everyone skips)
Most people jump straight to "what exercises should I do?" Without first understanding your environment, you're setting yourself up for failure. Here's what you need to evaluate:
Available floor space
Measure the area you can use without moving furniture. You need at least 6 feet by 6 feet for most floor exercises (lunges, burpees, yoga flows). If you have less, you'll need to prioritize exercises that don't require lateral movement, like step-ups, glute bridges, and standing overhead presses.
Edge case: If your space is a narrow hallway, focus on linear movements - forward lunges, marching, and wall sits. Avoid side shuffles or jumping jacks.
Noise and impact
Are you on a second-floor apartment? Do you have roommates working from home? High-impact moves like jump squats or burpees can be disruptive. The thing nobody tells you: you can modify almost any exercise to be low-impact without losing effectiveness. Switch squat jumps for step-ups, or replace box jumps with alternating lunges.
Equipment inventory
List what you actually own. Don't buy a bunch of gear upfront. Start with nothing, then add one or two items strategically. Here's what I've found works across different budgets:
- Zero equipment: Bodyweight exercises, but you'll need to get creative with progressive overload (more reps, slower tempo, unilateral work).
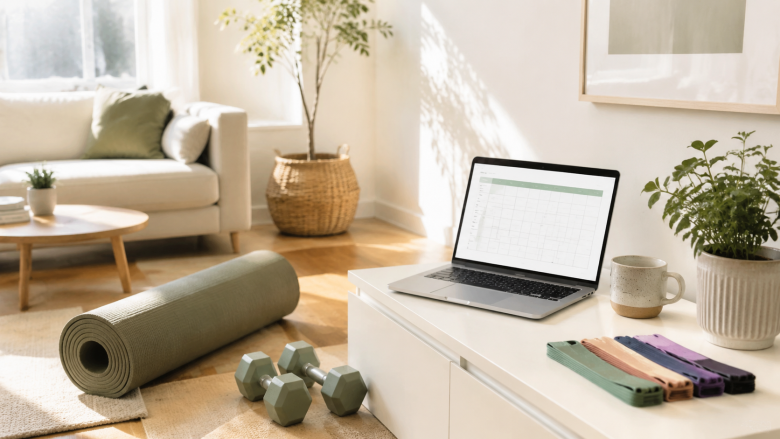
- Minimal ($20-50): Resistance bands (loop and tube), a yoga mat, and a sturdy chair for step-ups and tricep dips.
- Moderate ($50-150): Add a pair of adjustable dumbbells or kettlebells, and a pull-up bar (if you have a door frame that can handle it).
- Advanced ($150+): A barbell, plates, and a squat rack - but only if you have dedicated space and know how to use them safely.
Honest limitation: Resistance bands are great for portability, but they don't provide constant tension through the full range of motion. For exercises like rows, bands are fine; for presses, dumbbells are better. Choose based on your primary movement patterns.
Time and distractions
Be realistic about when you can work out. If you have kids, the morning might be your only quiet window. If you work from home, lunch breaks can work but you'll need to set a hard boundary. Most people don't realize that a 15-minute micro-workout done consistently beats a 45-minute routine you skip because you're overwhelmed.
Step 2: Choose your movement palette (with progressions and regressions)
Instead of a random list of exercises, build a "palette" of 6-8 movements that cover the fundamental patterns: push, pull, squat, hinge, lunge, core, and carry. For each pattern, I'll show you three levels - beginner, intermediate, and advanced - so you can always progress or regress as needed.
Push (horizontal and vertical)
- Beginner: Wall push-ups, incline push-ups (hands on a chair).
- Intermediate: Standard push-ups, decline push-ups (feet on a chair).
- Advanced: Archer push-ups, single-arm dumbbell floor press, pike push-ups.
Pull
- Beginner: Band rows, table rows (under a sturdy table).
- Intermediate: Inverted rows using a low bar or rings, single-arm dumbbell rows.
- Advanced: Pull-ups (if you have a bar), weighted rows.
Squat
- Beginner: Chair squats (sit and stand), box squats.
- Intermediate: Bodyweight squats, goblet squats (with a dumbbell or kettlebell).
- Advanced: Bulgarian split squats, pistol squats (assisted or full).
Hinge
- Beginner: Glute bridges, hip thrusts (feet on the floor).
- Intermediate: Single-leg glute bridges, Romanian deadlifts (with dumbbells).
- Advanced: Barbell deadlifts, single-leg RDLs.
Lunge
- Beginner: Stationary lunges (hold onto a chair), reverse lunges.
- Intermediate: Walking lunges, lateral lunges.
- Advanced: Bulgarian split squats, jumping lunges (low-impact version: step-ups).
Core
- Beginner: Dead bugs, bird dogs, planks on knees.
- Intermediate: Standard planks, side planks, lying leg raises.
- Advanced: Plank variations (taps, reaches), hanging knee raises (if you have a bar).
Carry
- Beginner: Farmer's carry with light dumbbells or books.
- Intermediate: Suitcase carry (single-sided), overhead carry.
- Advanced: Waiter's walk, heavy double carries.
Pro tip: When you can do 3 sets of 12 reps with perfect form at the intermediate level, move to the advanced version. But don't rush - quality matters more than the number. I've seen people injure themselves trying pistol squats too early. Stick with the regressions until you master the movement.
Step 3: Structure your week (frequency, recovery, and deload)
This is where most home routines fall apart - they ignore the rest and recovery that make progress possible. A sustainable home system includes planned deload weeks and active recovery days.
Workout frequency: how many days per week?
If you're a beginner, 3 full-body sessions per week is ideal. You get enough stimulus for growth while allowing 48 hours of recovery between sessions. Intermediate and advanced can do 4-5 days per week using an upper/lower split or push/pull/legs.
Trade-off: More days means less volume per session, which can be easier to fit into a busy schedule. But you also have to manage fatigue carefully. If you're constantly sore, you're doing too much.
Rest days are not optional
Your muscles grow during rest, not during the workout. Schedule at least two full rest days per week. On those days, light activities like walking, gentle stretching, or foam rolling can help recovery. Avoid the urge to "make up" missed workouts by cramming them into a rest day - that's a one-way ticket to burnout.
Deload weeks: every 4-6 weeks
After 4-6 weeks of consistent training, your nervous system and joints need a break. A deload week means reducing your volume and intensity by 40-50%. For example, instead of 3 sets of 10 reps at your usual weight, do 2 sets of 8 reps at a lighter weight. Or switch to bodyweight only for a week.
What can go wrong: If you skip deload weeks, you'll eventually hit a plateau or get injured. I learned this the hard way after six months of non-stop training led to a nagging shoulder issue - a week of deload fixed it completely.
Step 4: Build your first routine (a sample template)
Here's a simple 3-day full-body template that you can customize based on your movement palette. Each workout includes one exercise from each movement pattern. Do 3 sets of 8-12 reps, resting 60-90 seconds between sets.
Day 1: Strength focus
- Squat: Goblet squats (intermediate) or chair squats (beginner)
- Push: Incline push-ups or standard push-ups
- Pull: Band rows or inverted rows
- Hinge: Glute bridges
- Lunge: Reverse lunges
- Core: Dead bugs
- Carry: Farmer's carry (30 seconds per side)
Day 2: Endurance and conditioning
- Perform 3 rounds of a circuit, 45 seconds work, 15 seconds rest:
- Bodyweight squats
- Push-ups (or incline)
- Mountain climbers
- Plank hold
- Rest 2 minutes between rounds
Day 3: Full body with a focus on unilateral work
- Single-leg glute bridges (3x10 per leg)
- Stationary lunges (3x10 per leg)
- Single-arm dumbbell rows (3x10 per arm)
- Side planks (3x20 seconds per side)
- Suitcase carry (3x20 seconds per side)
Progression rule: When you can hit 12 reps on the last set with good form, add one more rep the next week, or increase the difficulty level (e.g., go from incline push-ups to standard).
Step 5: Track progress without gym machines
You don't need a bench press to measure strength. Use these home-friendly methods:
- Rep count: Track how many reps you can do in a set of a given exercise. Example: "I did 10 push-ups last week, now I can do 12."
- Time under tension: For planks, wall sits, or carries, record the hold time. Increase by 5-10 seconds each week.
- Rate of perceived exertion (RPE): On a scale of 1-10, how hard did the workout feel? If you're consistently at 7-8, you're in the right zone. If it's 9-10 every session, you need more recovery.
- Body measurements: Use a measuring tape around waist, hips, chest, arms, and thighs every 2-4 weeks. This is more reliable than a scale for tracking muscle gain or fat loss.
- Mobility milestones: Can you now touch your toes? Deeper squat? That's progress too.
Habit formation and motivation (the missing piece)
Even the best routine is useless if you don't do it. Here's what actually works for building the habit, based on what I've practiced and coached:
Habit stacking
Attach your workout to an existing habit. For example: "After I brush my teeth in the morning, I will immediately put on my workout clothes and do 10 minutes of movement." This leverages the neurological pathway of the existing habit, making the new one easier to start.
Environment design
Set up your workout space the night before. Lay out your mat, bands, dumbbells, and water bottle. Visual cues reduce the friction of starting. If your space is cluttered, it's harder to start. Most people don't realize that the two-minute rule works: commit to just two minutes of exercise. Once you start, you'll almost always keep going.
Accountability without guilt
Find a workout buddy for video calls, or join a small online community. But avoid guilt-tripping yourself if you miss a day. Schedule a "make-up" slot later in the week, or just move on. One missed session doesn't ruin progress; two weeks of guilt does.
For deeper recovery and mental reset, I highly recommend incorporating a short mindfulness practice after your workout. As we covered in our guide to setting up a cozy home meditation space, even five minutes of stillness can improve your body's recovery response and reinforce the habit loop.
Similarly, if you find yourself skipping workouts because you feel stiff in the morning, a gentle warm-up routine can be a game-changer. Check out our guide to starting a gentle morning stretch routine for specific moves that prime your body for movement.
Recovery and mobility (the non-negotiables)
Without intentional recovery, your home routine will eventually break down. Here's what to include:
Active recovery days
On your rest days, do 15-20 minutes of light activity: walking, easy cycling, or gentle yoga. This promotes blood flow without adding stress. For a structured approach, see our beginner's guide to home gentle yoga - it's perfect for recovery days.
Mobility work
Spend 5-10 minutes after each workout on mobility. Focus on the joints you used most: hips, shoulders, thoracic spine. Use foam rolling for tight muscles, but not on bony areas.
Sleep and nutrition
You can't out-train poor sleep. Aim for 7-9 hours per night. And while I'm not a nutritionist, a simple rule: eat protein at every meal, and don't drastically cut calories on training days. Your body needs fuel to adapt.
Common mistakes and how to avoid them
Mistake #1: Doing too much too soon
When I first started, I did 45-minute workouts every day for two weeks, then got sick and quit. Start with 3 sessions of 20 minutes. You can always add more volume later.
Mistake #2: Ignoring form
Without a mirror or coach, you can develop bad habits. Record yourself from the side and compare to a video of proper form. Focus on: flat back, neutral neck, weight in heels, controlled eccentric.
Mistake #3: Not scaling intensity
If you're not progressing, you're not improving. But if you're always sore, you're not recovering. Use the deload and progression guidelines above to find the sweet spot.
Mistake #4: Neglecting the warm-up
A 5-minute dynamic warm-up (arm circles, leg swings, torso twists, cat-cow) prevents injury and improves performance. You can combine it with the gentle stretches from our easy morning stretches guide.
Putting it all together: your 8-week plan
Here's a roadmap to launch your home workout system:
- Week 1-2: Audit your space, build your movement palette, and start with the 3-day template above. Use the beginner level for all exercises. Focus on form, not intensity.
- Week 3-4: Progress to intermediate level on at least two exercises. Add 2 extra reps per set if you can maintain good form. Begin tracking your rep counts and RPE.
- Week 5: Deload week. Reduce volume by 40% and skip intensity. Do your exercises but with lighter effort. This is a good time to work on mobility and try a new activity like walking or gentle yoga.
- Week 6-7: Return to full volume. Use the intermediate level for all exercises. If you feel ready, test one advanced movement per session.
- Week 8: Second deload week. Then repeat the cycle with a new goal - maybe add an extra day, or increase the weight.
One final insight: The best routine is the one you actually do. Perfect is the enemy of done. If you miss a day, don't spiral. Just do your next session as planned. Over time, consistency beats intensity every time.